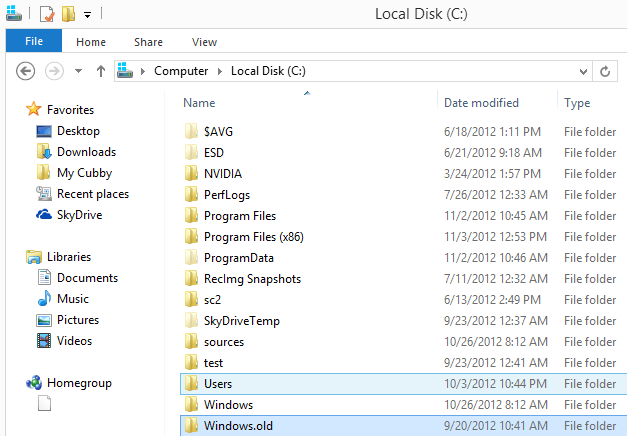
If you are installing Windows on a hard drive where Windows is already installed, and installing includes upgrading to Windows 8, you may end up with a Windows.old folder on the partition you have installed the new Windows version on. This is basically the Windows folder of the old installation which can be large in size. It may even happen that you have multiple windows.old folders on your computer. Windows distinguishes between those folders by appending a three digit number starting with .000 at the end of the folder name.
The Windows.old folder can easily be larger than 10 Gigabytes, and since it is usually not needed anymore, it makes sense to delete the folder and all of its contents to free up space.
Before you go ahead, I suggest you browse the folder once more to make sure that it does not contain any files that you may still need. This may include fonts that you have installed or any other type of file that you have saved into the Windows folder structure.

While you can theoretically go ahead and delete the Windows.old folder right away to free up the space it occupies on the hard drive, I?d recommend to use the built-in Disk Cleanup tool instead for the job. It is likely that it will also only delete the files on the drive, and while I have not seen any negative impact on the system after deleting the folder manually in Windows Explorer, I?d still suggest to use the Disk Cleanup tool instead.
You may sometimes run into access denied issues when trying to delete the Windows.old folder, which you can avoid with the cleanup tool.
Delete the Windows.old folder using the Disk Cleanup tool
- Press Windows-R to bring up the run box
- Enter cleanmgr and hit return
- This loads the Disk Cleanup tool
- Locate and click on the Clean up system files button and accept the UAC prompt if it is displayed on the system

- Check the Previous Windows installation(s) option to include all Windows.old folders in the cleanup and click on ok afterwards.
- The Disk Cleanup tool will then go ahead and delete all the folders and files that you have selected. The Windows.old folder should be gone after the cleanup.
Naturally there are other options to deal with the folder. You can boot from a Live CD and delete it or run Windows from the command line and delete it from there. Still, if you have access to a new version of Windows and can boot into it, I suggest using the Disk Cleanup tool for the process.
Enjoyed the article?: Then sign-up for our free newsletter or RSS feed to kick off your day with the latest technology news and tips, or share the article with your friends and contacts on Facebook, Twitter or Google+ using the icons below.Securely delete files with secure-delete
Reduce the folder size of Thunderbird
How to delete ?cannot delete files?
Folder Monitoring Made Easy With Portable App Watch 4 Folder
Fixing the folder access denied error message in Windows
About the Author:Martin Brinkmann is a journalist from Germany who founded Ghacks Technology News Back in 2005. He is passionate about all things tech and knows the Internet and computers like the back of his hand. You can follow Martin on Facebook or Twitter.You are here: Home ? Tutorials Basic ? How to delete the Windows.old folder after installation of Windows
Source: http://www.ghacks.net/2012/11/04/how-to-delete-the-windows-old-folder-after-installation-of-windows/
lotto winners mega ball winning numbers baltimore county current tv megamillions ncaa basketball tournament 2012 megamillions winning numbers
No comments:
Post a Comment
Note: Only a member of this blog may post a comment.